Hawaiian Cheesecake Salad is the ultimate tropical escape in a bowl that you can whip up without even glancing at your oven. If you have ever felt that mid-afternoon slump or needed a show-stopping dish for a last-minute potluck, this Hawaiian Cheesecake Salad is your new best friend. It balances the rich, velvety texture of cheesecake with the bright, acidic pop of fresh tropical fruit, making it a hit for both kids and adults who might usually turn their noses up at a standard fruit bowl. I know how it goes when you’re staring at a fridge full of ingredients and only have twenty minutes before the family starts asking “what’s for dessert?” This recipe saves the day every single time because it feels like a fancy indulgence but requires about as much effort as making a sandwich. You get that creamy, dreamy cheesecake vibe without the hassle of a water bath or the stress of a cracked crust. It is light, refreshing, and honestly tastes like a vacation on a spoon.
What is Hawaiian Cheesecake Salad?
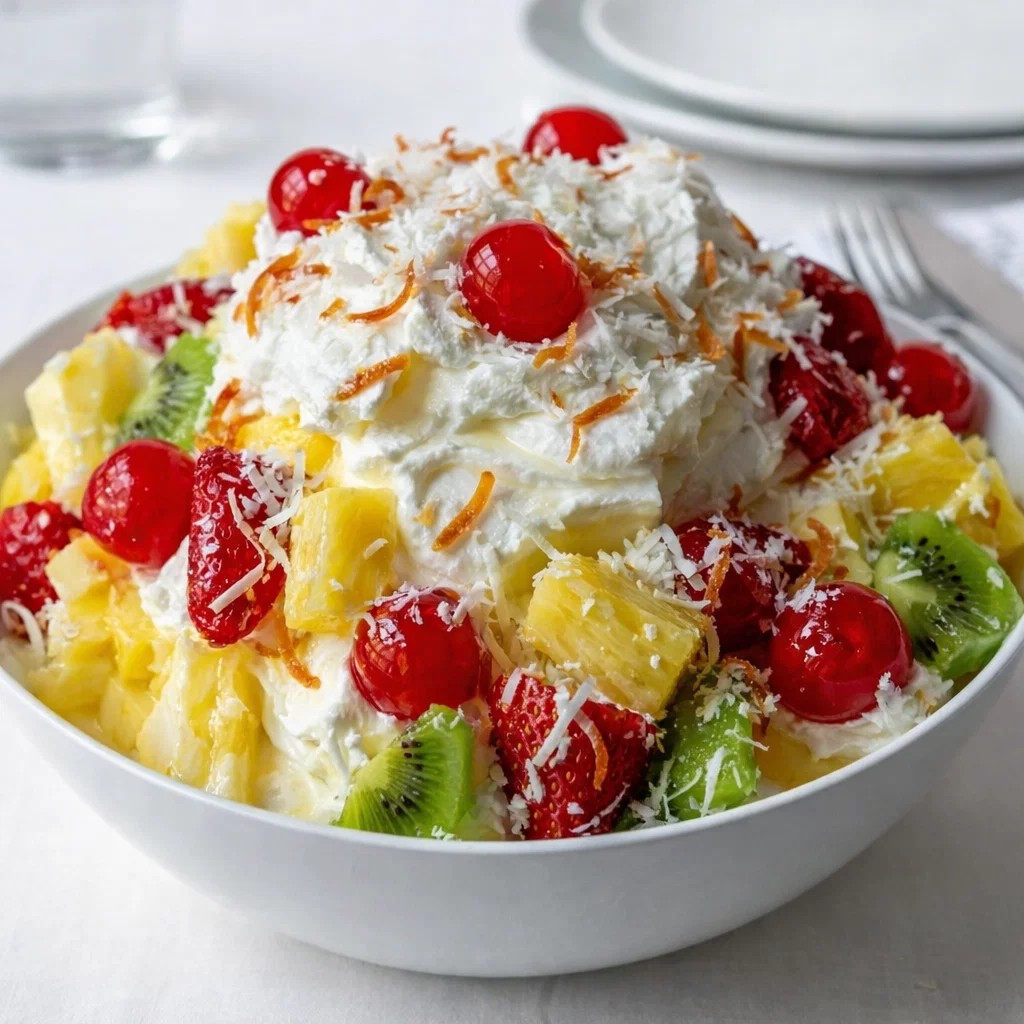
Hawaiian Cheesecake Salad is a brilliant hybrid dessert that bridges the gap between a traditional fruit salad and a decadent no-bake cheesecake. Instead of a heavy crust, the “salad” consists of bite-sized pieces of vibrant fruit like pineapple, kiwi, and strawberries tossed in a cloud-like dressing made from cream cheese and whipped topping. It’s a staple at American gatherings, particularly during the summer months when nobody wants to turn on the stove. While the name says “salad,” let’s be real—this is a dessert through and through, though the abundance of fresh fruit makes it feel much lighter than a slice of New York cheesecake. It’s the kind of dish that disappears in minutes at a BBQ because it’s cool, refreshing, and has just the right amount of sweetness to satisfy a sugar craving without leaving you feeling weighed down.
Reasons to Try Hawaiian Cheesecake Salad
You really need to give this Hawaiian Cheesecake Salad a go if you’re looking for a stress-free win in the kitchen. First off, it’s incredibly versatile; you can swap the fruits based on what’s looking good at the farmer’s market or what’s currently hiding in your crisper drawer. If you have picky eaters who pick out the “weird” fruits, you can easily customize the mix to keep everyone happy. Another huge plus is that it’s a “make-ahead” dream. You can prep the base and chop the fruit earlier in the day, then just fold them together when you’re ready to serve. This is a massive lifesaver for busy moms or professionals who are juggling a million things at once. Plus, it looks absolutely stunning on a table. The contrast of the bright red strawberries and green kiwi against the snowy white cheesecake cream makes it look like you spent hours on presentation when it actually took you about fifteen minutes.
Ingredients Needed to Make Hawaiian Cheesecake Salad
- 8 oz cream cheese, softened to room temperature for easy blending.
- 8 oz whipped topping, thawed completely in the fridge.
- 1/4 cup powdered sugar to add a touch of sweetness.
- 1 tsp vanilla extract for that classic bakery aroma.
- 2 cups fresh strawberries, hulled and halved.
- 1 cup pineapple chunks, fresh or well-drained canned.
- 2 kiwi, peeled and sliced into rounds or quarters.
- 1 cup fresh raspberries for a tart pop of color.
- 1/2 cup shredded sweetened coconut, toasted to golden perfection.
- Optional additions: banana slices, blueberries, or mango chunks for extra flair.
Instructions to Make Hawaiian Cheesecake Salad – Step by Step
Step 1: Start your journey toward the perfect dessert by getting that cream cheese ready in a large mixing bowl. You want to beat the softened cream cheese using a hand mixer or a stand mixer until it is completely light, airy, and fluffy. This Step by Step process ensures that you do not end up with any annoying little lumps of cheese in your smooth salad. If your cream cheese is still a bit cold, it will not blend correctly, so make sure it has sat out on the counter for a bit.
Step 2: Once the cheese is smooth, it is time to add the flavor. Toss in your powdered sugar and the vanilla extract. Continue to mix on a medium speed until the sugar is fully incorporated and the mixture looks like a glossy frosting. This Step by Step addition of sweetness allows the vanilla to permeate the entire base, giving it that nostalgic cheesecake flavor we all crave.
Step 3: Now, grab your spatula because we are going to fold in the thawed whipped topping. This is a crucial part of the Step by Step guide because you want to be gentle. Do not use the electric mixer here; instead, use a slow over-under motion with your spatula to combine the whipped topping with the cream cheese base. This keeps the air in the mixture, ensuring your salad stays light and fluffy rather than dense and heavy.
Step 4: Before the fruit meets the cream, you must rinse and dry all of your produce thoroughly. This Step by Step preparation is the secret to a salad that is not runny. Use a paper towel to pat the strawberries, kiwi, and pineapple dry. If the fruit is wet, the water will break down the cream cheese mixture and turn your beautiful dessert into a soup, which is definitely not the goal.
Step 5: Take your knife and slice the strawberries, kiwi, and pineapple into uniform, bite-sized pieces. Following this Step by Step cutting method ensures that every spoonful of the final dish has a perfect balance of fruit and cream. Keep the raspberries whole so they do not break apart too much during the mixing process.
Step 6: Gently tip all of your prepared fruit into the bowl with the cheesecake mixture. Using your spatula again, fold the fruit in until every single piece is evenly coated in that delicious white cream. This Step by Step folding ensures the delicate raspberries stay intact while the heavier pineapple and strawberries get distributed throughout the bowl.
Step 7: The hardest part of the entire Step by Step process is waiting. Cover your bowl with plastic wrap and pop it into the refrigerator for at least one hour. This chilling time allows the flavors to meld together and the cream cheese to firm up just enough to hold onto the fruit.
Step 8: Just before you are ready to serve this masterpiece to your hungry family or guests, sprinkle those toasted coconut flakes over the top. This final Step by Step touch adds a necessary crunch and a boost of tropical flavor that ties the whole Hawaiian theme together beautifully.
What to Serve with Hawaiian Cheesecake Salad
This salad is a superstar on its own, but it also plays well with others. If you’re hosting a brunch, it’s the perfect sidekick to a savory quiche or some salty bacon. The sweetness of the fruit and cream cuts through the richness of breakfast meats perfectly. For a summer BBQ, serve it alongside grilled chicken or kalua pork to keep the Hawaiian vibes going strong. It also makes a fantastic topping for simple pound cake or angel food cake if you want to stretch the recipe to feed a larger crowd. Honestly, I’ve been known to eat a bowl of this for breakfast because it’s basically fruit and dairy, right? No judgment here.
Key Tips for Making Hawaiian Cheesecake Salad
The biggest tip for success is to make sure your fruit is bone-dry. I cannot stress this enough—moisture is the enemy of a fluffy cheesecake salad. If you’re using canned pineapple, let it sit in a colander for a good ten minutes and then squeeze it with a paper towel. Also, pay attention to your cream cheese. If it’s too cold, you’ll get “cheesecake freckles” (little white lumps), which taste fine but don’t look as professional. If you want to add bananas, wait until the absolute last second to stir them in so they stay bright and firm rather than brown and mushy. Finally, toasting your coconut is a game-changer; it only takes three minutes in a dry pan but adds a smoky sweetness that elevates the whole dish.
Storage and Reheating Tips Hawaiian Cheesecake Salad
Since this is a cold, fresh dish, reheating is a big no-no. You want to keep this baby chilled until the moment it hits the table. If you have leftovers, which is a rare occurrence in my house, store them in an airtight container in the refrigerator. The salad will stay good for about 24 hours. After that, the fruit begins to release its natural juices, and the cream mixture can become a bit watery. It still tastes great, but it loses that Instagram-ready fluffiness. I don’t recommend freezing this salad, as the texture of the cream cheese and the fresh fruit will change significantly once thawed, and nobody wants a mushy strawberry.
FAQs
Can I use Greek yogurt instead of cream cheese? You can, but it will change the vibe. Greek yogurt will make it tangier and thinner. If you want that true “cheesecake” experience, stick with the cream cheese, or perhaps try a 50/50 split if you’re looking to cut some calories.
Is there a way to make this dairy-free? Absolutely. There are some fantastic vegan cream cheeses and almond-based whipped toppings available at most grocery stores these days that work perfectly in this recipe.
Can I use frozen fruit? I wouldn’t recommend it. Frozen fruit releases a lot of liquid as it thaws, which will turn your creamy dressing into a purple or red puddle. Fresh is definitely the way to go for the best texture and flavor.
Final Thoughts
Bringing a bowl of Hawaiian Cheesecake Salad to the table is like hand-delivering a little bit of sunshine. It’s one of those rare recipes that requires minimal effort but yields maximum praise. Whether you’re looking to brighten up a rainy Tuesday or you need a reliable crowd-pleaser for the neighborhood block party, this dish has your back. It’s sweet, tangy, creamy, and packed with all the best flavors of the tropics. So, grab your mixing bowl, chop up some fruit, and get ready to enjoy a dessert that feels like a celebration in every bite. Your friends and family will thank you, and you’ll love how easy it was to make them smile.
Print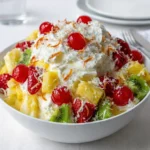
Hawaiian Cheesecake Salad: The Easiest 15-Minute Tropical Dessert
- Prep Time: 15 minutes
- Cook Time: 0 minutes
- Total Time: 1 hour 15 minutes
- Yield: 8 servings 1x
- Category: Dessert
- Method: No-Bake
- Cuisine: Hawaiian
- Diet: Vegetarian
Description
A creamy, no-bake Hawaiian Cheesecake Salad loaded with tropical fruits and a sweet cheesecake-style filling—perfect for potlucks, brunch, or a refreshing dessert.
Ingredients
- 8 oz cream cheese, softened
- 8 oz whipped topping, thawed
- 1/4 cup powdered sugar
- 1 tsp vanilla extract
- 2 cups fresh strawberries, halved
- 1 cup pineapple chunks
- 2 kiwi, peeled and sliced
- 1 cup raspberries
- 1/2 cup shredded sweetened coconut, toasted
- Optional: banana slices, blueberries, mango chunks
Instructions
1. Beat the softened cream cheese in a mixing bowl until light and fluffy.
2. Add powdered sugar and vanilla extract; mix until smooth.
3. Fold in the thawed whipped topping gently using a spatula.
4. Rinse and dry all fruits thoroughly.
5. Slice strawberries, kiwi, and pineapple into bite-sized pieces.
6. Gently fold the fruit into the cheesecake mixture until evenly coated.
7. Cover and refrigerate for at least 1 hour before serving.
8. Sprinkle toasted coconut flakes on top before serving.
Notes
Use chilled cream cheese and whipped topping for best texture.
Always dry fruit thoroughly to avoid a runny salad.
Add bananas just before serving to prevent browning.
Nutrition
- Serving Size: 1 cup
- Calories: 210
- Sugar: 16g
- Sodium: 90mg
- Fat: 13g
- Saturated Fat: 8g
- Unsaturated Fat: 4g
- Trans Fat: 0g
- Carbohydrates: 22g
- Fiber: 2g
- Protein: 2g
- Cholesterol: 35mg