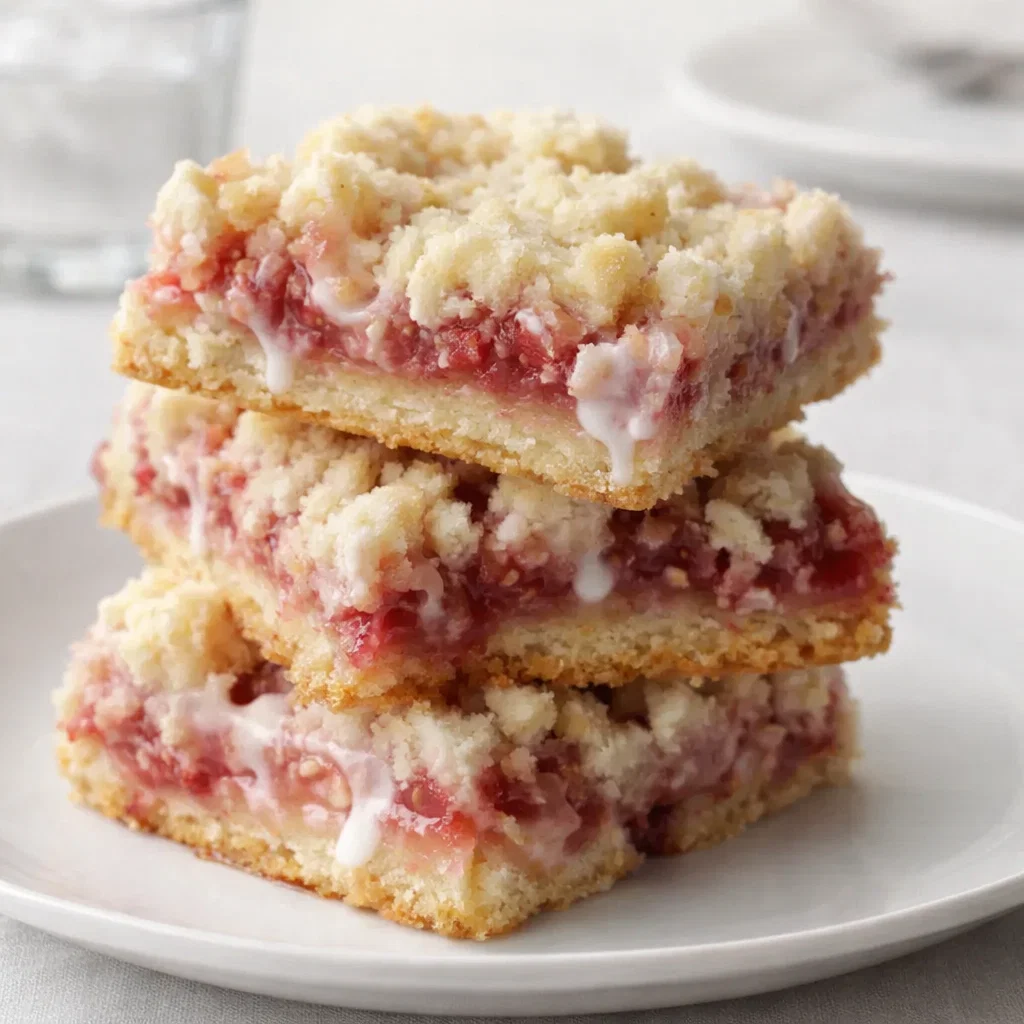
Strawberry Shortcake Bars are exactly what your summer soul needs right now. If you are a busy mom or a professional juggling a million tasks, you know the struggle of wanting a homemade treat without spending four hours in a hot kitchen. Honestly, who has the willpower for complicated pastry dough when the kids are screaming for a snack? This recipe is the answer because it gives you all that classic flavor with about half the effort. Strawberry Shortcake Bars bring together a buttery, melt-in-your-mouth shortbread crust and a jammy, fresh fruit center that is just heavenly. You will love how the sweet vanilla glaze ties everything together, making these bars a total bargain for your time and energy. Whether you are heading to a sunny backyard BBQ or just need a little win after a long Tuesday, these bars are the perfect way to use up those ripe berries.
What is Strawberry Shortcake Bars?
Strawberry Shortcake Bars are essentially the portable, less-fussy cousin of the traditional shortcake we all grew up with. Instead of individual biscuits that can sometimes turn out a bit dry, these bars use a cohesive shortbread base that doubles as a crunchy crumb topping. It is a brilliant little hack that saves you from mixing two different doughs. Imagine a thick layer of buttery crust, a massive heap of fresh, juicy strawberries in the middle, and a golden crumble on top. It’s like a pie, a cookie, and a cake had a beautiful summer baby. They are sturdy enough to hold in your hand but tender enough to satisfy that craving for something indulgent and sophisticated.
Reasons to Try Strawberry Shortcake Bars
You absolutely need to try Strawberry Shortcake Bars because they are a guaranteed crowd-pleaser that won’t break the bank or your spirit. First, the texture is a total win; you get that satisfying crunch from the crust paired with the soft, bursting fruit. Second, this recipe is incredibly forgiving. Even if you aren’t a pro baker, the “dump and press” method for the crust is simple and foolproof. Third, it is a fantastic way to rescue strawberries that might be slightly past their prime but still full of flavor. Finally, they are much easier to transport than a layered cake, making them the superior choice for picnics or potlucks where you don’t want to worry about a dessert meltdown.
Ingredients Needed to Make Strawberry Shortcake Bars
- 1 ¾ cups (250g) all-purpose flour: This provides the sturdy foundation for our buttery crust.
- ⅓ cup (65g) granulated sugar: Just enough to make the base sweet without being overpowering.
- 3 tablespoons (45g) packed light brown sugar: This adds a hint of caramel-like depth to the crumb.
- ¾ cup (170g) salted butter, melted: The magic ingredient that makes everything rich and delicious.
- 1 teaspoon (5ml) pure vanilla extract: A must-have for that classic bakery aroma.
- 3 cups (400g) chopped fresh strawberries: Use the reddest, ripest ones you can find for a stunning look.
- 2 tablespoons (25g) granulated sugar (for filling): This helps draw out the natural juices from the fruit.
- 1 tablespoon (9g) all-purpose flour (for filling): This thickens the juices so your bars don’t get soggy.
- ½ cup (60g) powdered sugar: The base for our silky-smooth finishing glaze.
- 1 tablespoon (15ml) light or heavy whipping cream: To get that perfect drizzling consistency.
- ¼ teaspoon pure vanilla extract (for glaze): Because you can never have too much vanilla.
Instructions to Make Strawberry Shortcake Bars – Step by Step
Step 1: To start your Step by Step journey toward dessert perfection, you need to get your oven ready. Preheat that beauty to 350°F (175°C). While it warms up, take an 8×8-inch square baking pan and line it with parchment paper. Pro tip: leave about a two-inch overhang on the sides. This acts like a little handles so you can lift the entire block of bars out once they are cooled, making cutting them a breeze rather than a messy struggle.
Step 2: Now, let’s build that incredible crust. In a medium-sized mixing bowl, whisk together your flour, granulated sugar, and brown sugar. Make sure you break up any stubborn brown sugar lumps with your fork. Once the dry stuff is combined, pour in your melted salted butter and vanilla. Stir it with a spoon until it looks a bit shaggy, then get in there with your clean fingertips. Toss the mixture until it forms large, beautiful crumbs. This part is oddly satisfying! Take about two-thirds of this mixture and press it firmly into the bottom of your lined pan. You want a solid, even layer, so feel free to use the bottom of a flat glass to pack it down.
Step 3: Pop that crust into the oven for about 15 to 20 minutes. You are looking for a light golden color and a firm set. While that bakes, you can prep the star of the show: the strawberries. In a separate bowl, toss your chopped strawberries with a little sugar and flour. This Step by Step approach ensures each piece of fruit is coated, which prevents the filling from becoming a watery mess during the second bake.
Step 4: Once the crust is out and slightly cooled, spread your strawberry mixture evenly over the top. Now, take that remaining one-third of the crumb mixture you saved and sprinkle it over the berries. Don’t worry about covering every single spot; seeing the bright red fruit peeking through the golden crumbs is what makes these look so mouth-watering.
Step 5: Put the pan back into the oven for another 30 to 35 minutes. You’ll know it’s ready when the strawberry juices are bubbling like a little delicious volcano and the top is perfectly toasted. This Step by Step process builds layers of flavor that a single bake just can’t match. Once done, let the bars cool completely in the pan. If you try to cut them while they’re hot, they might fall apart, and we want beautiful squares!
Step 6: Finally, it’s time for the “wow” factor. Whisk your powdered sugar, cream, and vanilla in a small bowl until it’s smooth and glossy. If it’s too thick, add a tiny drop more cream. Drizzle it over the cooled bars in whatever pattern your heart desires. Lift them out using the parchment handles, slice into 12 generous bars, and get ready for the compliments.
What to Serve with Strawberry Shortcake Bars
These bars are honestly a powerhouse on their own, but if you want to go the extra mile, a dollop of freshly whipped cream is the classic choice. For a truly decadent summer treat, serve a warm bar with a big scoop of premium vanilla bean ice cream. The way the cold cream melts into the jammy strawberry filling is a total game-changer. If you are hosting a brunch, these pair beautifully with a crisp glass of sparkling rosé or a light, citrusy iced tea. They are versatile enough to be a casual afternoon snack or the sophisticated finale to a fancy dinner party.
Key Tips for Making Strawberry Shortcake Bars
The most important tip is to choose the right berries. Look for strawberries that are fragrant and red all the way to the top. If they are too firm, they won’t soften enough; if they are mushy, your bars will be too wet. Also, don’t skimp on the cooling time! I know it is tempting to dive in, but letting the bars set is the secret to getting those clean, professional-looking edges. If you find your glaze is too runny, just add a tablespoon more of powdered sugar until it reaches that perfect ribbon-like consistency.
Storage and Reheating Tips Strawberry Shortcake Bars
If you actually have leftovers (which is rare in my house!), you can store these Strawberry Shortcake Bars in an airtight container. They stay fresh at room temperature for about a day, but for the best results, keep them in the refrigerator for up to three days. Chilling them actually makes the shortbread crust even more fudgy and delicious. If you prefer them warm, just pop a bar in the microwave for about 10 to 15 seconds. It will soften the crust and make the strawberries taste like they just came out of the oven.
FAQs
Can I use frozen strawberries? You can, but fresh is definitely better for texture. If you use frozen, don’t thaw them first, and maybe add an extra teaspoon of flour to the filling to soak up the extra moisture.
Can I make these gluten-free? Yes! You can substitute the all-purpose flour with a high-quality 1:1 gluten-free baking flour blend. The texture might be slightly more delicate, so handle them with care.
Why did my crust turn out crumbly? Make sure you press the bottom layer very firmly into the pan. If it’s too loose, it won’t hold together as a solid base. Also, ensure your butter measurement is accurate!
Final Thoughts
Making these Strawberry Shortcake Bars is a fantastic way to celebrate the season without the stress of complicated baking. They are simple, reliable, and absolutely packed with that fresh berry flavor we all crave. By following this guide, you have a foolproof plan to create a dessert that looks like it came from a high-end bakery but feels like home. Don’t wait for a special occasion to treat yourself; sometimes a random Wednesday is reason enough for a buttery, glazed strawberry delight. Grab your apron and give these a try—your family will definitely thank you!
Print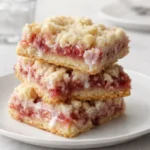
Strawberry Shortcake Bars: The Ultimate Summer Dessert Secret
- Prep Time: 10 minutes
- Cook Time: 29 minutes
- Total Time: 39 minutes
- Yield: 12 servings 1x
- Category: Dessert
- Method: Baking
- Cuisine: American
- Diet: Vegetarian
Description
These Strawberry Shortcake Bars feature a tender, buttery shortbread crust that doubles as a crumb topping, layered with juicy fresh strawberry filling and finished with a smooth vanilla glaze. Perfect for spring and summer gatherings with a sweet, fresh flavor in every bite.
Ingredients
- Crust and Crumb
- 1 ¾ cups (250g) all-purpose flour
- ⅓ cup (65g) granulated sugar
- 3 tablespoon (45g) packed light brown sugar
- ¾ cup (170g) salted butter, melted (or add a pinch of salt if using unsalted butter)
- 1 teaspoon (5ml) pure vanilla extract
- Strawberry Filling
- 3 cups (400g) chopped fresh strawberries
- 2 tablespoon (25g) granulated sugar
- 1 tablespoon (9g) all-purpose flour
- Glaze
- ½ cup (60g) powdered sugar
- 1 tablespoon (15ml) light or heavy whipping cream
- ¼ teaspoon pure vanilla extract
Instructions
1. Preheat the oven to 350°F (175°C) and line an 8×8-inch square baking pan with parchment paper leaving a 2-inch overhang for easy removal.
2. In a medium bowl combine the all-purpose flour, granulated sugar, brown sugar, and salt if using unsalted butter. Mix well to remove lumps.
3. Add melted butter and vanilla extract to the dry ingredients. Stir with a spoon then use fingertips to create large crumbs.
4. Press about two-thirds of the crumb mixture evenly into the bottom of the prepared pan and smooth the surface.
5. Bake for 15–20 minutes until the crust is lightly golden then remove and allow it to cool slightly.
6. In another bowl mix the chopped strawberries, granulated sugar, and flour until evenly coated.
7. Spread the strawberry mixture evenly over the baked crust layer.
8. Crumble the remaining crumb mixture evenly over the strawberries.
9. Bake for 30–35 minutes until the strawberries are bubbling and the topping is golden brown.
10. Remove from the oven and let the bars cool completely in the pan.
11. Whisk powdered sugar, cream, and vanilla extract in a small bowl until smooth to make the glaze.
12. Drizzle glaze over the cooled bars, cut into 12 bars, and serve.
Notes
Use ripe but firm strawberries to keep the filling juicy without becoming watery.
If using unsalted butter in the crust add a pinch of salt to balance the sweetness.
Allow the bars to cool completely before adding glaze so it does not melt.
Store leftovers in an airtight container in the refrigerator for up to 3 days.
Bars can be served chilled or at room temperature.
Nutrition
- Serving Size: 1 bar